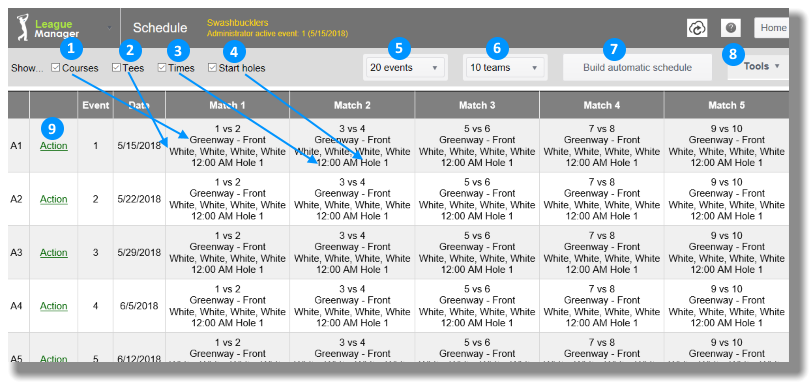
Figure 1: Schedule
Insert one or more events
In League Manager you can insert one or more events. If you want to manually create the entire season schedule, you can continue to insert events until all of the Automatically scheduled events (A1, A2, etc.) are pushed off the bottom of the schedule.
- Open the Main Menu, and click Schedule in the League section.
- Click on Action link for the event adjacent (above or below) to where you want to insert an event.
- Click on Insert above event or Insert below event link (see blue arrows in Figure 2 below).
Figure 2: Insert event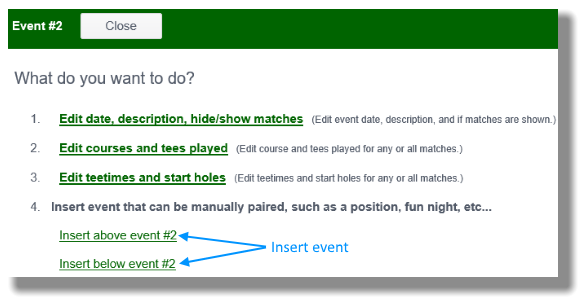
- Confirm by clicking OK button that you want to insert event in the location stated in confirmation screen (see Figure 3 below).
Figure 3: Confirm insertion of event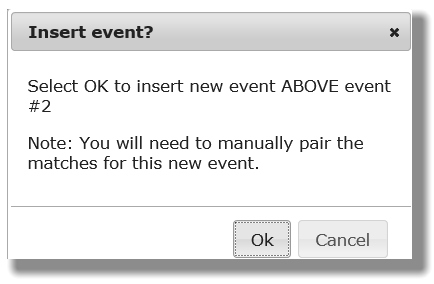
- The inserted event will have "M?" in the left hand column which is the unlabeled Event type column. Click on the Action link for this M? event.
- Click on Manually pair matches link (see Figure 4 blue arrow).
Figure 4: Manual event actions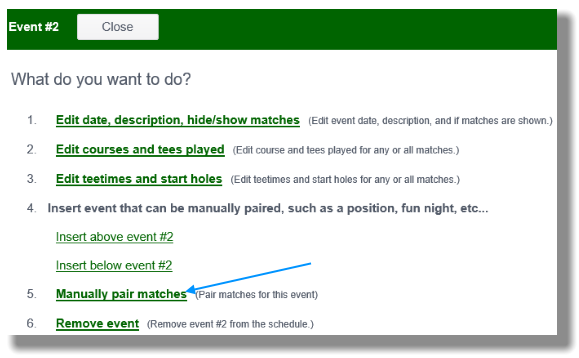
- Click on team numbers in opponent pairs (if Team 1 is playing Team 3, click the boxes labeled 1 and 3 consecutively). When you have paired all opponents, click Save button.
Figure 5: Designate pairings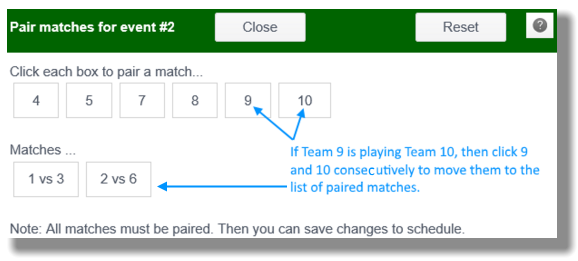
- You will now see your manually inserted event with an "M" instead of an "M?".
- Each time you insert an event manually, the bottom event with the latest date is bumped off the schedule. For example, if you have 20 events (Automatic events A1 through A20) and you insert a manual event between A4 and A5, then A20 is dropped off the schedule.
Note: If you want to manually create your entire schedule, then continue to insert events until all the Automatic events are dropped off the bottom of your schedule.
Delete manually created event
- Open the Main Menu, and click Schedule in the League section.
- Click on the Action link for the manually created event (M) you want to delete.
- Click on Remove event link (see Figure 4 above).
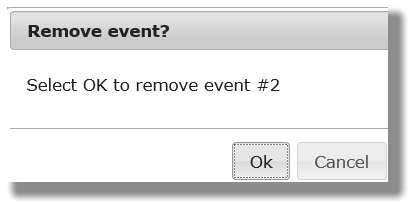
- Click OK button to confirm (see Figure 6 below).
Figure 6: Confirm remove event